
Organize screenshots into a document and export it
For: anyone turning a set of screenshots into a finished process document, a how-to or a review, with nobody else in the loop.
The captures are the easy part. What takes the afternoon is the document: a heading for each area, a numbered step under each screenshot, images placed in order, and something presentable at the end. A bundle already has that structure, because you built it as you captured, so the export just lays it out.
The flow
- Press
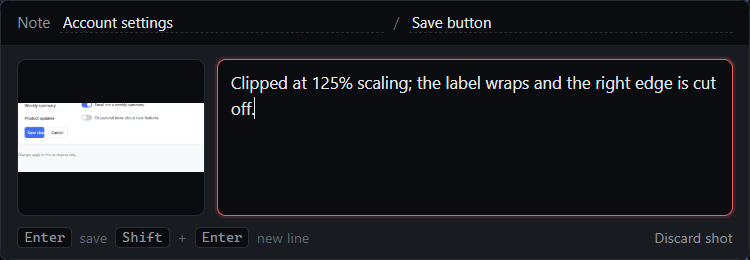
Ctrl+Shift+2for each screenshot. A note box appears under the region; type what is happening, or what to do, and pressEnter.Shift+Enteradds a line,Esckeeps the shot with no note. - Press
Ctrl+Shift+Gwhen you move to a new page or area. Give the group you just finished a master note: what the page is, and what is true of everything on it. - Press
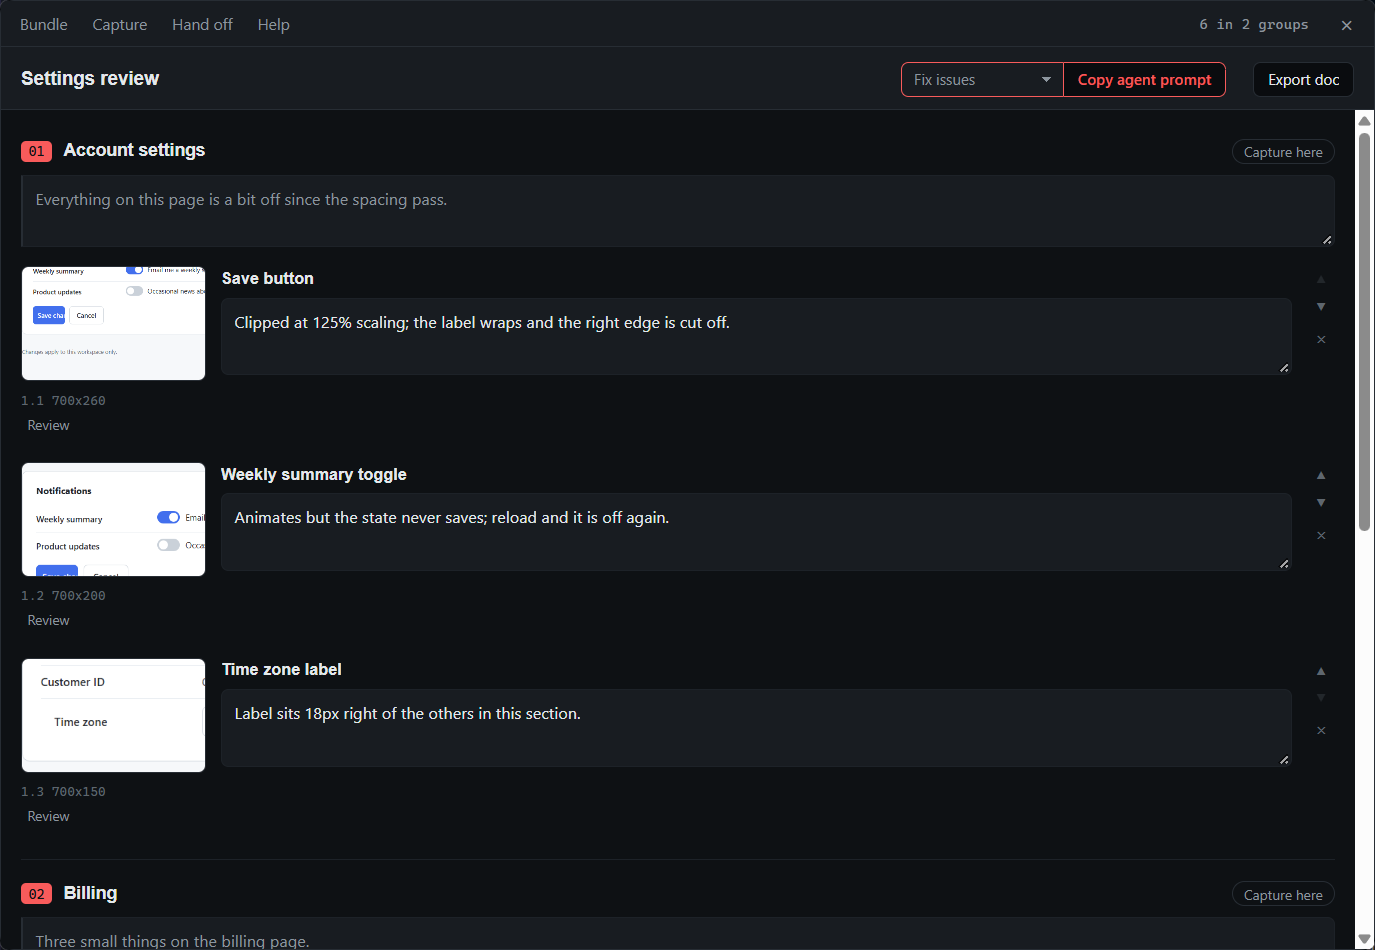
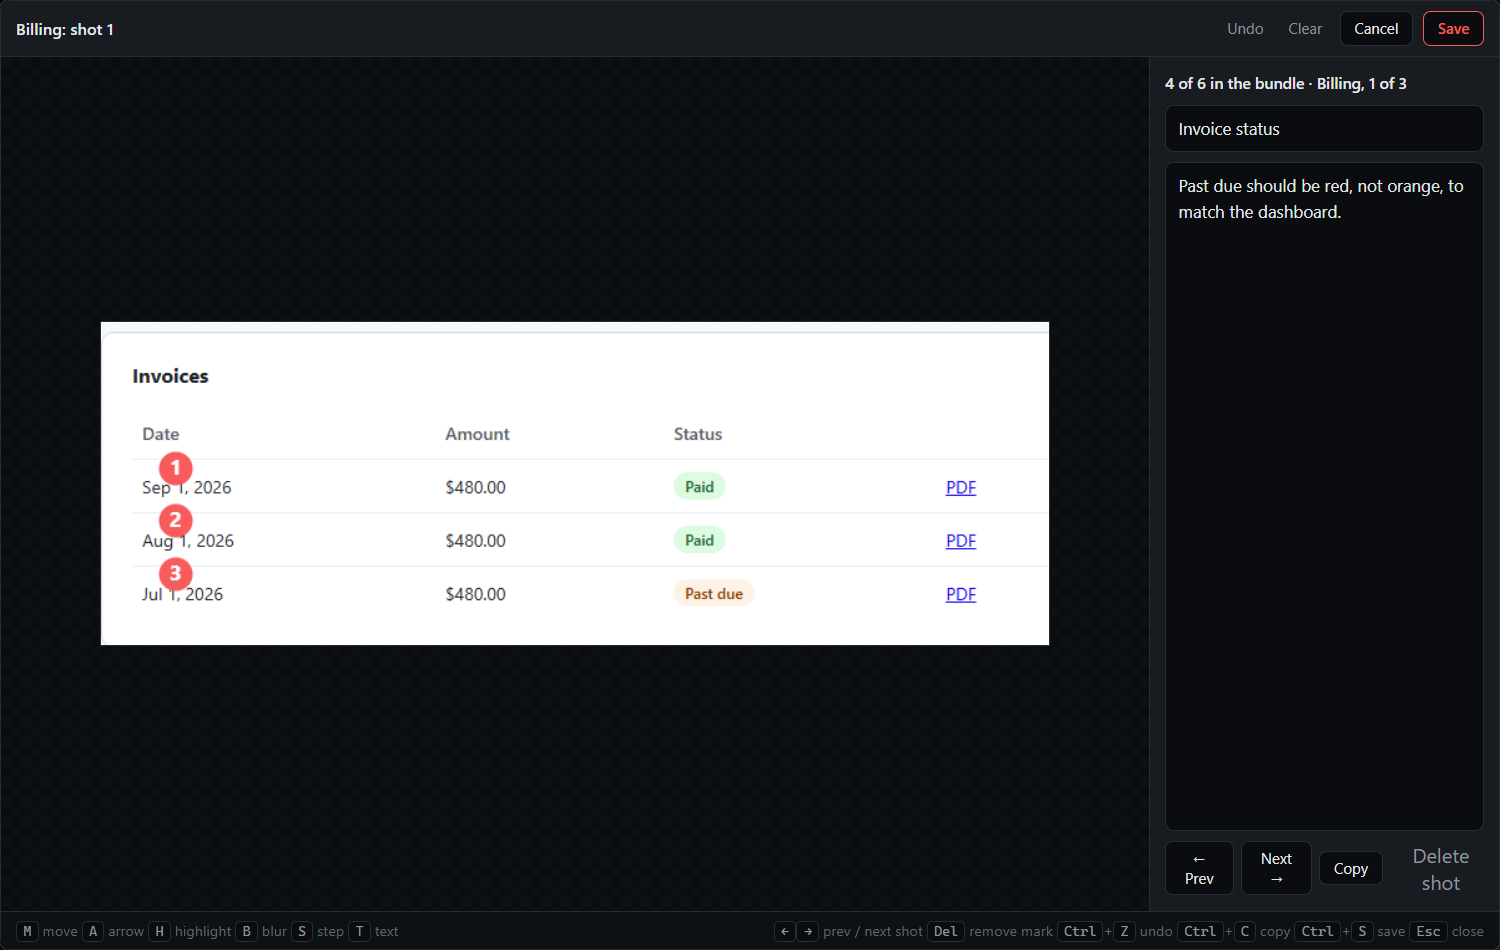
Ctrl+Shift+Qto open the bundle window. Rename the bundle, drag shots to reorder them or move them between groups, and open any shot in the editor to add arrows, highlights and step counters, or to blur something that should not leave the building. - Press Export doc and pick Markdown or a web page.
What you get
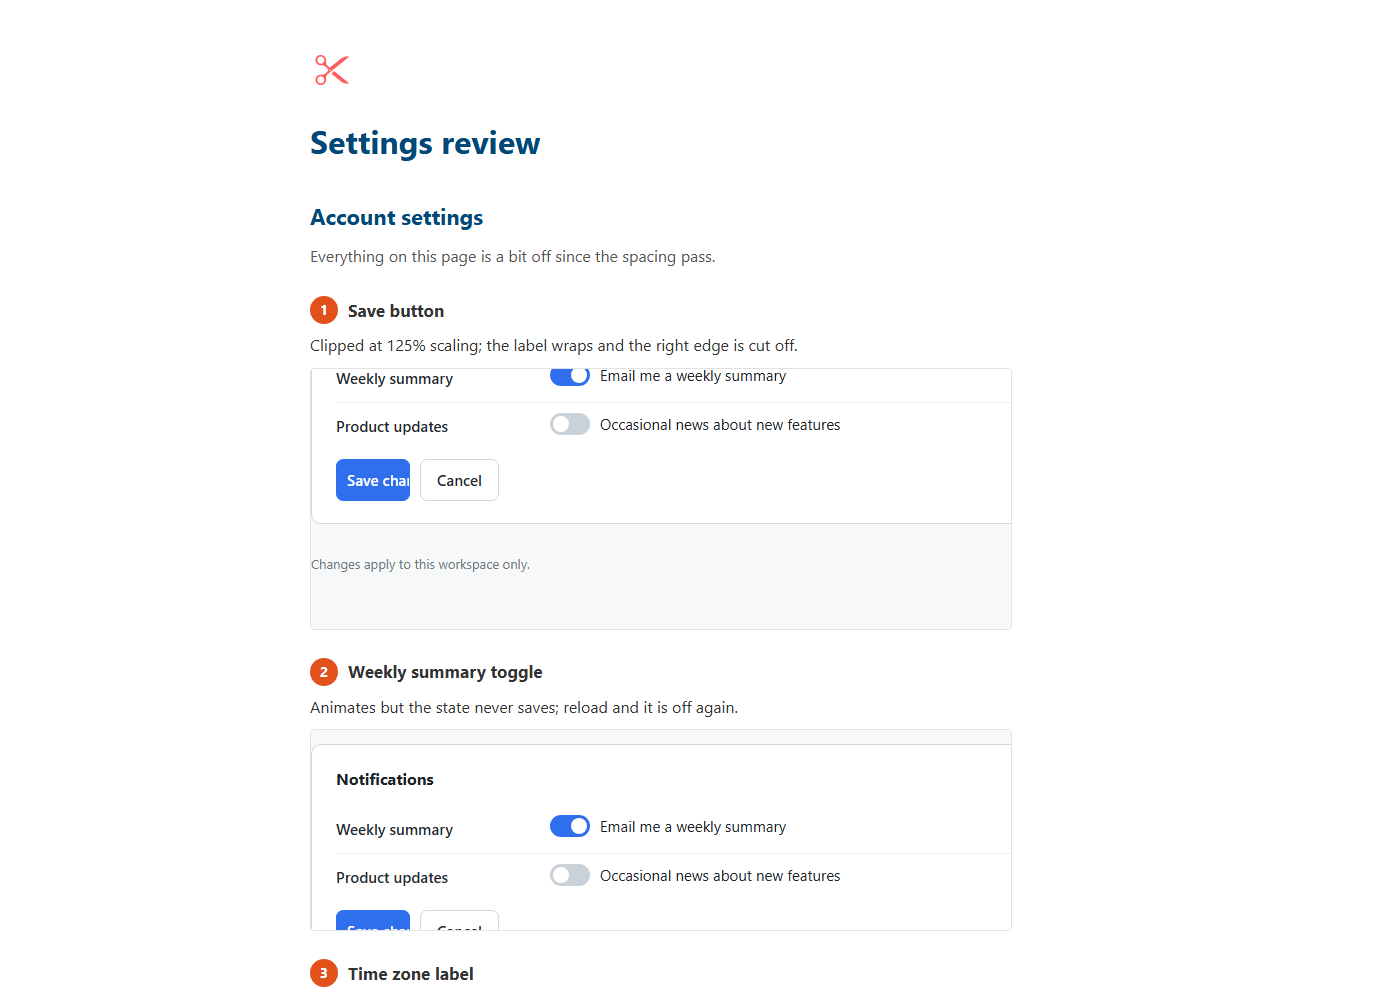
A document with a section per group and a numbered step per shot. In outline:
Settings review
  1. Settings page              section; the master note is its intro
     Step 1  [01.png]  Open Settings from the account menu.
     Step 2  [02.png]  Save. The button is at the bottom right.
  2. Profile page
     Step 1  [01.png]  Change the display name, then Save.
As a web page it is one self-contained file with the images embedded, ready to send. As Markdown it sits beside the images, ready for a docs platform. The bundle itself stays where it is: a folder under ~/QACut/ with the screenshots and a bundle.md that reads top to bottom.
Tips
- No agent is involved. Hand the document to one only if you want the prose polished; see Hand a bundle to an AI agent with your brand kit.
- Rename the bundle in the bundle window and its folder is renamed with it. While capturing, click Group 1 or Shot 1 in the note box header to name things as you go.
- Capture here in the bundle window points new captures at an earlier group, so a screenshot you forgot lands in the right section. A finished bundle can be reopened later from Bundle → Open bundle….
- If there is a logo in
~/QACut/brand/, Export doc embeds it in the document. Blur in the editor is pixelation, so what you hide is really gone from the exported image.
Related
- Auto-capture a process into step-by-step screenshots, when you would rather do the process than screenshot it.
- Hand a bundle to an AI agent with your brand kit, when the prose should be in your company's voice.
- Build a task list of UI fixes for an AI agent, when the bundle is a list of things to fix rather than steps to follow.
- Record polished screen recordings, when the same steps should be a video rather than a document.
- Bundles for agents in the docs.